No-Bake Rainbow Cheesecake Bars
Highlighted under: Vegan Baking Recipes
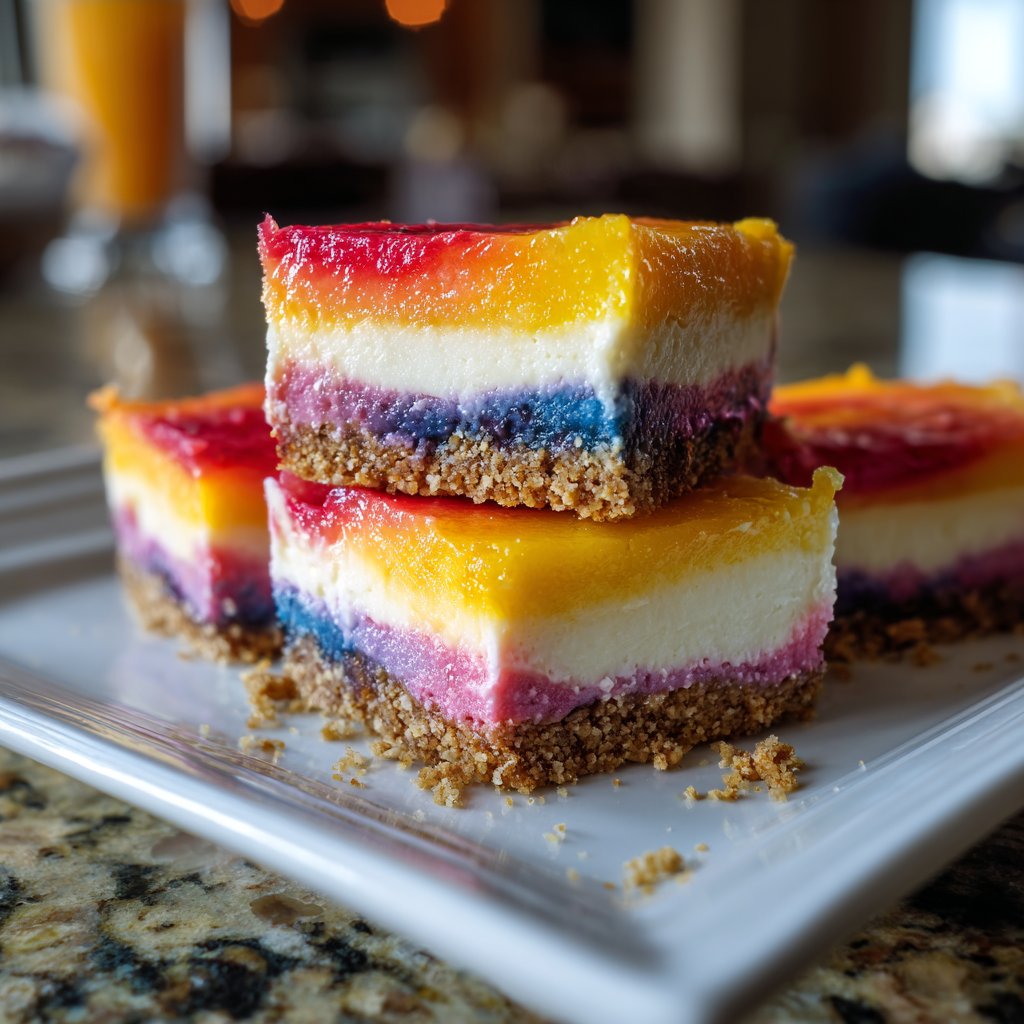
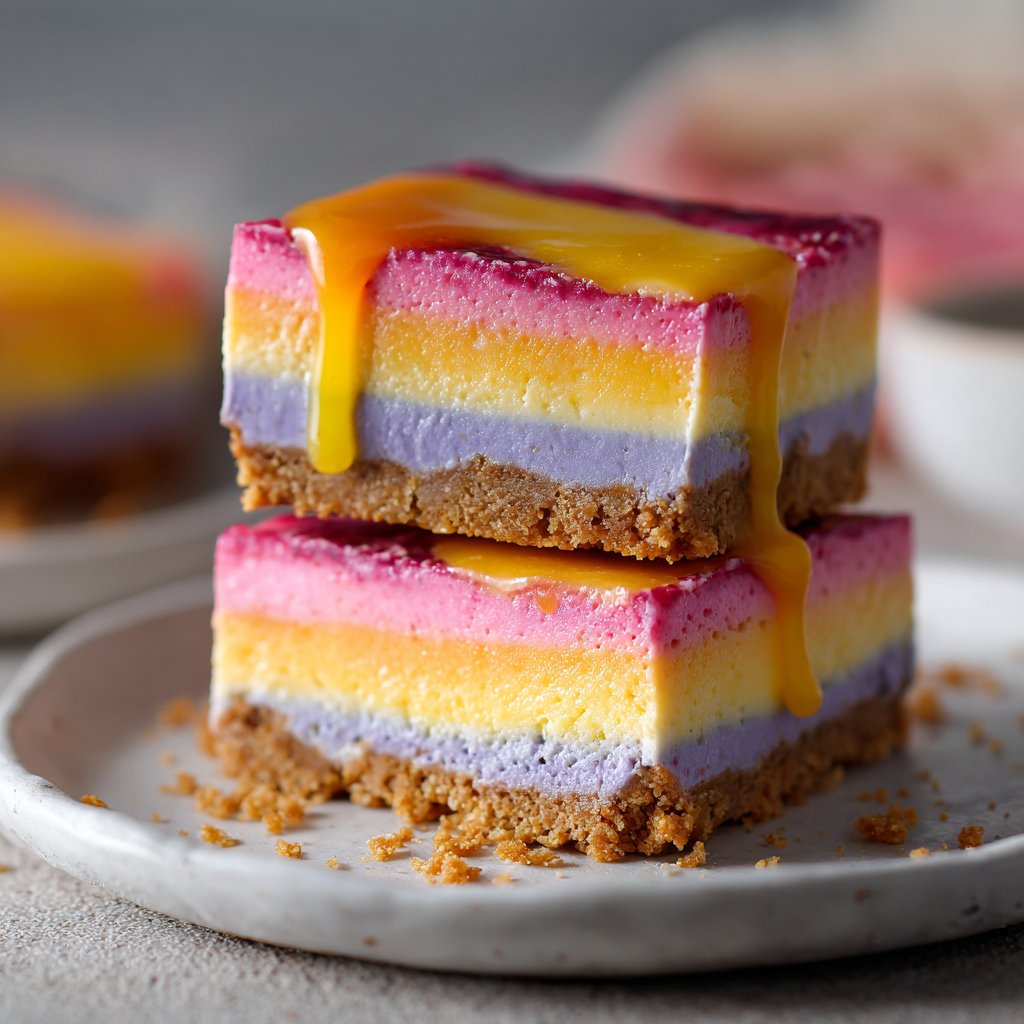
I absolutely love making No-Bake Rainbow Cheesecake Bars because they not only look stunning but are also incredibly easy to prepare. The vibrant layers bring a burst of color to any gathering, captivating everyone’s attention. Each creamy layer offers a delightful contrast of flavors that delight the taste buds without requiring an oven. Whether for a birthday party or a simple family dessert night, these bars guarantee smiles all around. Plus, they can be made ahead of time, so you can enjoy more time with your loved ones rather than in the kitchen.
One of my favorite memories was creating these No-Bake Rainbow Cheesecake Bars for a friend's birthday. I was inspired by the colors of the rainbow, and I couldn’t believe how simple it was to layer those beautiful hues using just food coloring and a classic cheesecake mix. The process was not only fun but also beautifully rewarding as I watched the layers form.
Another tip I discovered is to let each layer set in the fridge for about 30 minutes before adding the next. This ensures the layers remain distinct, and the cheesecake maintains a beautiful structure. Everyone raved about these bars, and I couldn’t have been happier seeing their smiles!
Why You'll Love This Recipe
- Colorful presentation that's sure to impress guests
- No baking required, making it a stress-free dessert
- Creamy texture with a perfect balance of sweetness
- Versatile recipe that can be customized with different flavors
The Role of Cream Cheese
Cream cheese is the backbone of this No-Bake Rainbow Cheesecake Bars recipe, providing richness and a creamy texture that's hard to beat. Be sure to use properly softened cream cheese, as this helps achieve a smooth filling without lumps. If the cream cheese is too cold, it can create a lumpy texture that won’t blend well with the other ingredients. I recommend leaving the cream cheese out at room temperature for at least an hour before you start mixing.
For those looking to switch things up, you can substitute regular cream cheese with a lighter version or even flavored varieties for a unique twist. Greek yogurt is another excellent substitute; just use a little less powdered sugar since yogurt can be tangy. This swap will keep your bars creamy while adding a slightly different flavor that complements the sweetness of the dessert.
Perfecting Your Layers
Achieving beautifully distinct layers in your cheesecake bars requires patience. After spreading each colored cheesecake filling over the crust, ensure that it is evenly distributed and chilled until it feels firm to the touch—this usually takes about 30 minutes in the fridge. If the layers aren't properly set, they may blend together when you add subsequent colors, ruining the vibrant presentation.
I recommend using a small offset spatula to spread the filling smoothly; it gives you better control. If you notice that a layer begins to sag or melt while you're working, simply place the pan back in the refrigerator for a few minutes to firm it up again before adding the next layer.
Storage and Serving Suggestions
These cheesecake bars can be made ahead of time and stored in the refrigerator for up to five days. To keep them fresh, cover the pan tightly with plastic wrap. If you want to store them for a more extended period, you can freeze the cut bars, wrapped individually in plastic and then in aluminum foil. Just thaw them in the fridge the night before serving for best results.
When serving, consider pairing these bars with fresh fruit or a drizzle of chocolate sauce for an added layer of flavor. They can also be cut into smaller squares for bite-sized treats, perfect for parties or gatherings. A sprinkle of edible glitter or festive sprinkles on top before serving can elevate their appearance and make them even more delightful.
Ingredients
Gather the following ingredients to make these vibrant cheesecake bars.
Crust
- 1 ½ cups graham cracker crumbs
- ½ cup unsalted butter, melted
- ¼ cup sugar
Cheesecake Filling
- 16 oz cream cheese, softened
- 1 cup powdered sugar
- 1 tsp vanilla extract
- 1 ½ cups heavy whipping cream, whipped
- Food coloring (red, orange, yellow, green, blue, purple)
Ensure all ingredients are room temperature for the best results.
Instructions
Follow these steps to create your No-Bake Rainbow Cheesecake Bars.
Prepare the crust
In a bowl, combine the graham cracker crumbs, melted butter, and sugar. Press the mixture firmly into the bottom of a 9x9 inch square pan and refrigerate while preparing the filling.
Make the cheesecake filling
In a mixing bowl, blend the softened cream cheese with powdered sugar and vanilla extract until smooth. Gently fold in the whipped cream until fully combined.
Color the filling
Divide the cheesecake mixture evenly into six bowls. Add a few drops of different food coloring to each bowl and mix until you achieve the desired shades.
Layer the cheesecake
Take the first bowl of cheesecake filling and spread it evenly over the crust. Refrigerate for 30 minutes to set. Repeat this process with each color, allowing each layer to set before adding the next.
Chill and serve
Once all layers are added, refrigerate the bars for at least 3 hours or overnight. Cut into squares and serve chilled.
Make sure to keep the bars refrigerated until ready to serve for the best texture.
Pro Tips
- For added flavor, consider mixing in a teaspoon of lemon juice to the cheesecake mixture or adding a layer of fruit puree between the cheesecake layers.
Troubleshooting Common Issues
If your cheesecake filling is too runny, it might be due to overmixing the whipped cream or not whipping it enough. The whipped cream should form stiff peaks when beaten, which helps to stabilize the filling. To fix a runny mixture, refrigerate it for 10-15 minutes to allow it to thicken, or gently fold in more whipped cream to improve the texture.
Another common issue occurs when the graham cracker crust is too crumbly. To enhance its cohesion, ensure that the melted butter is evenly mixed throughout the crumbs. If it still doesn’t hold together, you can add a tablespoon of cold water or an extra tablespoon of butter until the desired consistency is achieved.
Flavor Variations You Can Try
While the rainbow effect is stunning, feel free to experiment with flavors that suit your palate. Instead of standard vanilla extract, you can try almond extract, which adds a lovely nuttiness. Additionally, consider incorporating fruit purees for natural color and flavor; strawberry or blueberry purees can be swirled into the filling for a vibrant twist.
For a more decadent touch, mix in crushed candies or cookies into specific layers. Adding crushed Oreos to the chocolate layer creates a delightful contrast, while crushed pistachios can provide a crunchy texture to the green layer. The possibilities are vast, so don't hesitate to explore different ingredients that excite your taste buds.
Questions About Recipes
→ Can I use different flavors for the cheesecake?
Absolutely! You can substitute the vanilla extract with almond or lemon extract for a unique twist.
→ How long will these cheesecake bars last in the fridge?
These bars will stay fresh for up to 5 days if stored in an airtight container in the refrigerator.
→ Can I use a different type of crust?
Yes! Feel free to use Oreo crumbs or even a gluten-free crust for a different flavor.
→ Is there a way to make these dairy-free?
Yes, you can substitute the cream cheese with a dairy-free cream cheese alternative and use coconut cream in place of heavy whipping cream.
No-Bake Rainbow Cheesecake Bars
Created by: The Feliciabakes Team
Recipe Type: Vegan Baking Recipes
Skill Level: Easy
Final Quantity: 12 bars
What You'll Need
Crust
- 1 ½ cups graham cracker crumbs
- ½ cup unsalted butter, melted
- ¼ cup sugar
Cheesecake Filling
- 16 oz cream cheese, softened
- 1 cup powdered sugar
- 1 tsp vanilla extract
- 1 ½ cups heavy whipping cream, whipped
- Food coloring (red, orange, yellow, green, blue, purple)
How-To Steps
In a bowl, combine the graham cracker crumbs, melted butter, and sugar. Press the mixture firmly into the bottom of a 9x9 inch square pan and refrigerate while preparing the filling.
In a mixing bowl, blend the softened cream cheese with powdered sugar and vanilla extract until smooth. Gently fold in the whipped cream until fully combined.
Divide the cheesecake mixture evenly into six bowls. Add a few drops of different food coloring to each bowl and mix until you achieve the desired shades.
Take the first bowl of cheesecake filling and spread it evenly over the crust. Refrigerate for 30 minutes to set. Repeat this process with each color, allowing each layer to set before adding the next.
Once all layers are added, refrigerate the bars for at least 3 hours or overnight. Cut into squares and serve chilled.
Extra Tips
- For added flavor, consider mixing in a teaspoon of lemon juice to the cheesecake mixture or adding a layer of fruit puree between the cheesecake layers.
Nutritional Breakdown (Per Serving)
- Calories: 250 kcal
- Total Fat: 16g
- Saturated Fat: 10g
- Cholesterol: 40mg
- Sodium: 170mg
- Total Carbohydrates: 24g
- Dietary Fiber: 0g
- Sugars: 20g
- Protein: 3g